We are finally seeing daffodils blooming and the tulips are soooo close. While we wait (and try not to weep as the snow pours down in mid April), we made some paper tulips to sit on the windowsill.

Welcome to the third post in our series of kid-friendly, upcycled art tutorials. Considering how simple these tulips are to make, they're surprisingly pretty. I credit the lovely sweeps of textured paint to a 9-year-old, not too worried about uniformity.
What you need:


If you don't have shades of paint to work with, you can obviously just have uniform colors! You could also create a collage version of these guys. Tear out lots of green (and pink, etc) shades from magazines and cover your pages.

Some patience is required - one side has to be completely dry before you flip over the paper and paint the other side.

While you're waiting for the paint to dry, make your template. You can print off the image above. However, if you're like me and don't have a printer at home, just draw the simple shapes onto cardstock and play a little until you have a template you like.


Welcome to the third post in our series of kid-friendly, upcycled art tutorials. Considering how simple these tulips are to make, they're surprisingly pretty. I credit the lovely sweeps of textured paint to a 9-year-old, not too worried about uniformity.
What you need:
- Three sheets of firm paper or thin cardstock
- Paint in different shades of green and... well, whatever color you want your flowers to be
- A ruler
- Scissors and gluestick
- The tulip template below

STEP 1
Get painty - you need to cover both sides of two pieces of paper. One page for the stems and leaves, and one page for the blooms. I gave Ms R lots of different shades of paint to play with.

If you don't have shades of paint to work with, you can obviously just have uniform colors! You could also create a collage version of these guys. Tear out lots of green (and pink, etc) shades from magazines and cover your pages.

Some patience is required - one side has to be completely dry before you flip over the paper and paint the other side.

STEP 2
While you're waiting for the paint to dry, make your template. You can print off the image above. However, if you're like me and don't have a printer at home, just draw the simple shapes onto cardstock and play a little until you have a template you like.

STEP 3
Use your template to draw outlines of blooms, stems and leaves onto the painted pages.

Still part of Step 3 - I just wanted to show you the two template pieces up close.

STEP 4
Get cutting! My daughter worked on the flowers. I cut the stems and leaves.

Some close-ups to show you how fun the paint mess can be. We used pages ripped from my sketch book so while one side was blank, the other was painted in some way already. That's another reason we got all this interesting texture.

Another shot, because I can't help it. I love how these turned out!

STEP 5
Start folding the blooms. Start with them because they're easier to fold than the stems, and let you get a feel for the way your paper stock is going to fold.

Easiest way to get a clean fold? Lay a ruler down the center of the bloom and bend the paper gently. Then you can finish off with your fingers. My apologies for subjecting you to my kid's horrifying finger nails!

STEP 6
Make a bloom by gluing two pieces together along ONE of the sides. See below for shape you're aiming for.

When you view the bloom from below, This is what you should see.

This is what your folded stems should look like. Join them together in the same way you did the blooms above.

STEP 7
Cut a slit in the top of each stem and slide in the bloom. It's best to start with a small slit and see how the bloom looks. You may also want to make a small cut in the bottom of the bloom. A little trial and error here is the right approach.

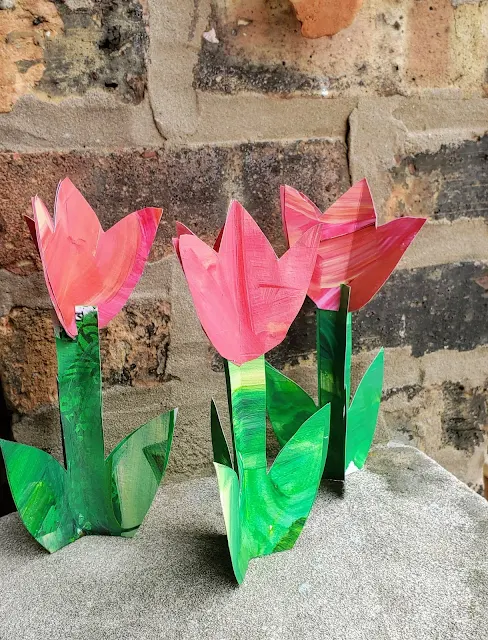
And now we have paper flowers to keep us going until our chilly world finally blossoms.

Look at all those different shades and textures!

Yes, these final shots are gratuitous.
Add your comment